
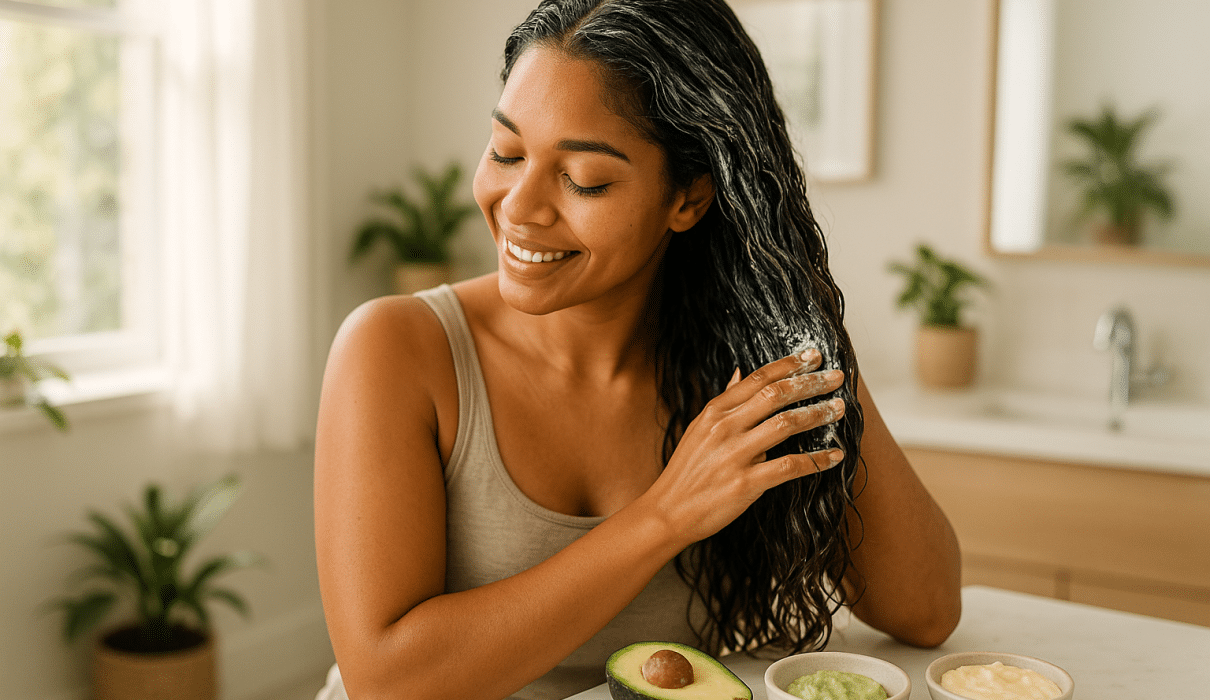
DIY hair masks have revolutionized home hair care, proving that you don’t need expensive salon treatments to achieve healthy, beautiful hair. The secret lies in your kitchen, where common ingredients can be transformed into powerful hair treatments that rival professional products in both effectiveness and results.
Creating DIY hair masks from ingredients you already have at home offers unparalleled convenience, cost-effectiveness, and control over what you put on your hair. Unlike commercial products filled with synthetic ingredients and preservatives, DIY hair masks provide pure, natural nourishment that your hair can readily absorb and benefit from.
This comprehensive guide reveals five transformative DIY hair masks that utilize everyday kitchen ingredients, each scientifically formulated to address specific hair concerns from dryness and damage to oiliness and lack of shine. Whether you’re dealing with brittle hair from heat styling, dullness from environmental damage, or simply want to maintain healthy hair naturally, these DIY hair masks provide effective solutions using ingredients you likely have in your pantry right now.
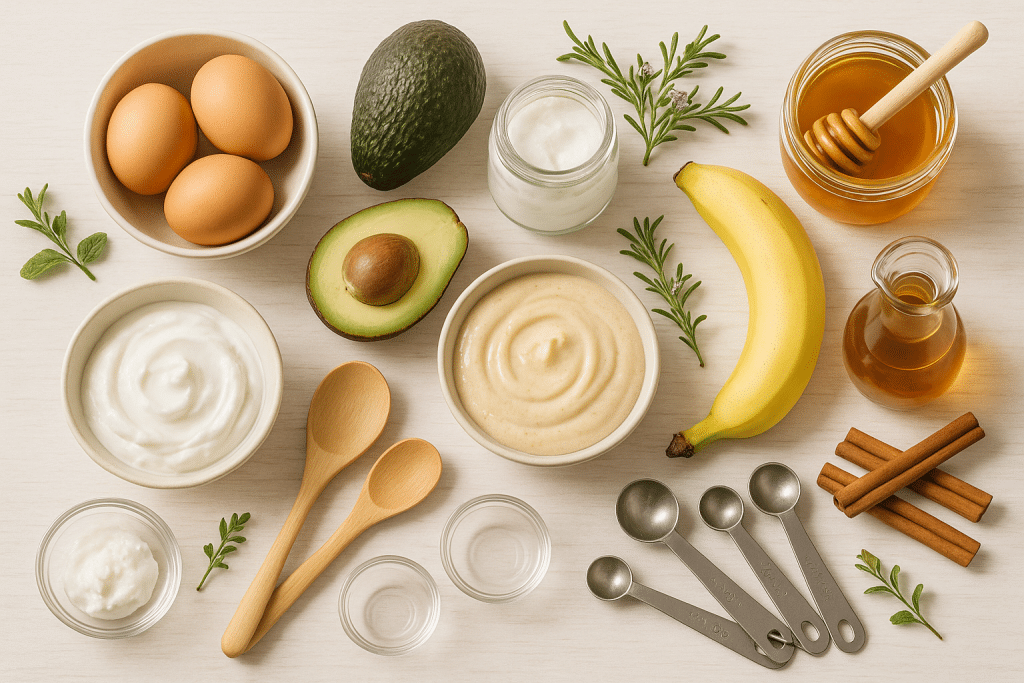
Image Alt Text: DIY hair masks ingredients from kitchen including honey, eggs, avocado, and coconut oil arranged for natural hair treatment
The Science Behind Effective DIY Hair Masks
Understanding how DIY hair masks work at the molecular level helps explain why simple kitchen ingredients can produce such remarkable results for hair health and appearance.
How DIY Hair Masks Penetrate and Nourish Hair
Hair structure consists of three layers: the cuticle (outer protective layer), cortex (middle layer containing proteins), and medulla (innermost core). Effective DIY hair masks work by:
Cuticle Smoothing: Natural oils and emollients in DIY hair masks smooth the hair cuticle, reducing frizz and increasing shine. Ingredients like coconut oil have small enough molecules to penetrate between cuticle scales.
Protein Strengthening: Many kitchen ingredients used in DIY hair masks contain proteins that temporarily fill in damaged areas of the hair shaft, improving strength and elasticity.
Moisture Binding: Humectant ingredients in DIY hair masks draw moisture from the environment and bind it to the hair, providing lasting hydration.
pH Balancing: Properly formulated DIY hair masks help maintain hair’s optimal pH of 4.5-5.5, keeping the cuticle sealed and preventing damage.
Scientific Research Supporting DIY Hair Masks
Research published in the Journal of Cosmetic Science demonstrates that natural ingredients commonly used in DIY hair masks can significantly improve hair health:
- Coconut Oil: Studies show 40% reduction in protein loss when used regularly
- Honey: Research indicates antimicrobial properties and moisture retention benefits
- Egg Proteins: Clinical trials demonstrate improved hair elasticity and reduced breakage
- Avocado Oil: Studies reveal enhanced hair shaft lubrication and cuticle repair
Dr. Sarah Martinez, a cosmetic chemist specializing in natural hair care, explains: “The effectiveness of DIY hair masks lies in their simplicity and biocompatibility. Kitchen ingredients often contain the same active compounds found in expensive commercial treatments, but in more bioavailable forms that hair can readily utilize.”
Advantages of DIY Hair Masks Over Commercial Products
Customization: DIY hair masks can be tailored to specific hair needs and adjusted based on results, something impossible with mass-produced products.
Freshness: Unlike commercial products that may sit on shelves for months, DIY hair masks are made fresh, ensuring maximum potency of active ingredients.
No Harmful Additives: DIY hair masks avoid sulfates, parabens, and synthetic fragrances that can irritate sensitive scalps or cause long-term damage.
Cost-Effectiveness: The ingredients for multiple DIY hair masks typically cost less than a single high-end commercial treatment.
Transparency: You know exactly what’s in your DIY hair masks, eliminating concerns about hidden ingredients or unclear labeling.
Essential Kitchen Ingredients for DIY Hair Masks
Before diving into specific recipes, understanding the properties of common kitchen ingredients helps you create the most effective DIY hair masks for your hair type and concerns.
Protein-Rich Ingredients for Strengthening DIY Hair Masks
Eggs: The ultimate protein source for DIY hair masks, eggs contain complete amino acid profiles that temporarily repair damaged hair cuticles. The yolk provides fats for moisture, while whites offer pure protein for strength.
Greek Yogurt: Rich in lactic acid and proteins, yogurt gently exfoliates the scalp while providing conditioning benefits. The probiotics may also support scalp health.
Milk: Contains casein proteins and lactic acid that smooth hair cuticles and provide gentle cleansing properties when used in DIY hair masks.
Moisturizing Ingredients for Hydrating DIY Hair Masks
Honey: A natural humectant that draws moisture from the air and binds it to hair. Raw honey also provides antimicrobial benefits for scalp health.
Coconut Oil: Penetrates hair shafts more effectively than most oils due to its molecular structure. Provides both immediate and long-term conditioning benefits.
Avocado: Rich in vitamins A, D, and E, plus healthy fats that deeply nourish dry, damaged hair. The natural oils help seal hair cuticles.
Olive Oil: Contains vitamin E and antioxidants that protect hair from environmental damage while providing deep conditioning benefits.
Cleansing and Clarifying Ingredients for DIY Hair Masks
Apple Cider Vinegar: Balances scalp pH, removes product buildup, and smooths hair cuticles for enhanced shine when used in DIY hair masks.
Baking Soda: Gently removes buildup and excess oils, though it should be used sparingly due to its alkaline nature.
Lemon Juice: Provides natural clarifying properties and can help remove mineral buildup from hard water.
Specialty Ingredients for Targeted DIY Hair Masks
Banana: Rich in potassium, vitamins, and natural oils that help prevent split ends and add elasticity to hair.
Oatmeal: Provides gentle exfoliation for the scalp and contains compounds that soothe irritation.
Coffee Grounds: Stimulate scalp circulation and may help promote hair growth when used in DIY hair masks.
Recipe 1: The Ultimate Moisturizing DIY Hair Mask for Dry, Damaged Hair
This deeply nourishing DIY hair mask combines three powerhouse ingredients to restore moisture, repair damage, and improve hair elasticity.
Ingredients and Their Benefits
1 ripe avocado: Provides vitamins A, D, E, and healthy fats for deep nourishment 2 tablespoons raw honey: Acts as a humectant to draw and retain moisture 2 tablespoons coconut oil (melted): Penetrates hair shaft for lasting conditioning
Scientific Rationale for This DIY Hair Mask
This combination creates a triple-action treatment that addresses multiple aspects of hair damage:
- Avocado’s monounsaturated fats penetrate the hair cuticle, providing deep conditioning from within
- Honey’s humectant properties ensure moisture retention for up to 72 hours after application
- Coconut oil’s lauric acid has been proven to reduce protein loss and strengthen hair structure
Detailed Preparation Instructions
Step 1: Ingredient Preparation
- Allow avocado to reach perfect ripeness (soft but not mushy)
- Warm coconut oil gently until liquid but not hot
- Use raw, unprocessed honey for maximum benefits
Step 2: Mixing Technique
- Mash avocado thoroughly until completely smooth (no lumps)
- Gradually incorporate honey while mixing
- Slowly add melted coconut oil while stirring to prevent separation
- Mix until achieving completely uniform consistency
Step 3: Application Method for Maximum Effectiveness
- Start with damp, clean hair for better penetration
- Section hair into 4-6 portions for even distribution
- Apply generously from mid-length to ends, avoiding scalp
- Use wide-tooth comb to ensure even coverage
- Twist hair into loose bun and cover with shower cap
Processing and Removal
Processing Time: 30-45 minutes for optimal penetration Removal Technique:
- Rinse with cool water first to prevent oil from setting
- Follow with gentle sulfate-free shampoo if needed
- Apply regular conditioner only to ends if hair feels heavy
Expected Results and Timeline
Immediate Effects: Hair feels softer, smoother, and more manageable Weekly Use Results: Significantly reduced breakage and improved elasticity Monthly Benefits: Visible improvement in shine, reduced split ends, enhanced overall hair health
This DIY hair mask is particularly effective for:
- Chemically processed or color-treated hair
- Heat-damaged hair from styling tools
- Naturally dry or coarse hair textures
- Hair exposed to harsh environmental conditions
Recipe 2: Protein-Packed Strengthening DIY Hair Mask for Weak, Brittle Hair
This strengthening DIY hair mask focuses on rebuilding hair structure using kitchen ingredients rich in proteins and strengthening compounds.
Power Ingredients for Hair Reconstruction
2 whole eggs: Provide complete amino acid profile for temporary hair repair 1/4 cup plain Greek yogurt: Offers casein proteins and gentle exfoliation 1 tablespoon olive oil: Adds moisture and vitamin E for protection
The Science of Protein Treatment in DIY Hair Masks
Hair is approximately 91% protein (primarily keratin), making protein treatments essential for maintaining hair strength. This DIY hair mask works by:
Temporary Protein Filling: Egg proteins temporarily fill in gaps in damaged hair cuticles, creating smoother, stronger hair pH Balancing: Greek yogurt’s natural acidity helps maintain optimal hair pH Protective Coating: Olive oil creates a protective barrier that prevents further protein loss
Professional-Grade Mixing Techniques
Temperature Control: All ingredients should be at room temperature to prevent egg from cooking Mixing Order:
- Whisk eggs thoroughly until completely uniform
- Gradually add yogurt while whisking to prevent separation
- Slowly drizzle olive oil while continuing to whisk
- Mix until achieving mayonnaise-like consistency
Strategic Application for Maximum Protein Penetration
Pre-Treatment: Lightly dampen hair with water for better adhesion Sectioning: Divide hair into 8-10 small sections for thorough coverage Application Technique:
- Apply from roots to ends using fingers or application brush
- Gently massage into scalp for circulation benefits
- Ensure every strand is coated for uniform treatment
Processing Protocol
Duration: 20-30 minutes (longer may cause protein overload) Environment: Cool room temperature to prevent egg from setting Cover: Use plastic cap to prevent drying and enhance penetration
Removal and Follow-Up Care
Critical Removal Steps:
- Rinse with cool water only (hot water will cook egg proteins)
- Gently work through hair while rinsing to remove all residue
- Follow with mild clarifying shampoo if any residue remains
- Apply light conditioner only to ends if needed
Frequency and Long-Term Benefits
Usage Schedule: Once weekly for damaged hair, bi-weekly for healthy hair Progressive Results:
- Week 1-2: Improved manageability and reduced breakage
- Week 3-4: Visible increase in hair elasticity and strength
- Month 2+: Significant improvement in overall hair integrity and appearance
Important Considerations:
- Perform strand test first to check for protein sensitivity
- Reduce frequency if hair becomes stiff or brittle (signs of protein overload)
- This DIY hair mask is most effective for high-porosity or damaged hair
Recipe 3: Clarifying and Shine-Boosting DIY Hair Mask for Oily, Dull Hair
This purifying DIY hair mask removes buildup while adding natural shine, perfect for hair that appears flat, greasy, or lacks luster.
Detoxifying Ingredients That Restore Hair Vitality
3 tablespoons apple cider vinegar: Balances pH and removes mineral buildup 2 tablespoons raw honey: Provides gentle cleansing and moisture 1 tablespoon baking soda: Removes stubborn product buildup (use sparingly)
Understanding Scalp Balance in DIY Hair Masks
Oily, dull hair often results from scalp imbalance, product buildup, or environmental factors. This DIY hair mask addresses these issues through:
pH Restoration: Apple cider vinegar naturally balances scalp pH, reducing excess oil production Gentle Clarification: Baking soda removes buildup without stripping natural oils completely Moisture Regulation: Honey provides hydration while regulating sebum production
Precise Formulation for Safety and Effectiveness
Critical Ratios: The 3:2:1 ratio ensures effectiveness while preventing damage pH Testing: Final mixture should test between 4.5-6.0 for hair safety Dilution Factor: This concentration provides results without causing dryness or irritation
Specialized Application Technique
Pre-Application Preparation:
- Mix ingredients in non-metal bowl to prevent chemical reactions
- Test mixture pH with strips if available
- Apply to unwashed hair for maximum clarifying effect
Strategic Application Pattern:
- Focus initial application on scalp and roots where oil accumulates
- Work mixture through mid-lengths with gentle massaging motions
- Apply sparingly to ends to prevent over-drying
- Use fingers to distribute evenly without creating tangles
Processing and Monitoring
Duration: 15-20 minutes maximum (longer may cause dryness) Signs to Watch For:
- Tingling sensation is normal
- Excessive burning means immediate removal needed
- Hair should feel clean but not stripped
Thorough Removal Process
Multi-Step Removal:
- Rinse thoroughly with lukewarm water for 2-3 minutes
- Check for any grainy residue and continue rinsing if needed
- Follow with gentle sulfate-free shampoo to remove any remaining particles
- Apply light conditioner only to ends if hair feels dry
Results and Optimization
Immediate Benefits:
- Significantly increased volume and bounce
- Enhanced natural shine and light reflection
- Cleaner feeling scalp and reduced oiliness
Progressive Improvements:
- Longer intervals between washes as scalp balance improves
- Reduced need for dry shampoo or oil-absorbing products
- Enhanced effectiveness of other hair care products
Customization Options:
- Reduce baking soda for sensitive scalps
- Add 1 teaspoon lemon juice for extra shine
- Include 1 drop tea tree oil for antibacterial benefits
This DIY hair mask works exceptionally well for:
- Fine hair that appears limp or oily
- Hair with significant product buildup
- Scalps with overactive sebum production
- Hair dulled by hard water minerals
Recipe 4: Nourishing Growth-Stimulating DIY Hair Mask for Thinning Hair
This specialized DIY hair mask focuses on scalp health and circulation to create optimal conditions for hair growth while strengthening existing hair.
Growth-Supporting Ingredients from Your Kitchen
1 ripe banana (mashed completely smooth): Rich in potassium and vitamins that support follicle health 2 tablespoons plain yogurt: Provides probiotics and gentle exfoliation for scalp health 1 tablespoon honey: Offers antimicrobial properties and moisture for scalp conditioning 1 teaspoon cinnamon powder: Stimulates circulation and may promote growth
The Science of Growth Stimulation in DIY Hair Masks
Hair growth depends on follicle health, adequate circulation, and proper nutrition. This DIY hair mask addresses these factors through:
Circulation Enhancement: Cinnamon naturally increases blood flow to hair follicles Follicle Nourishment: Banana’s potassium and vitamins support cellular function Scalp Microbiome: Yogurt’s probiotics may help maintain healthy scalp bacteria balance Anti-inflammatory Action: Combined ingredients reduce scalp inflammation that can impede growth
Critical Preparation Steps for Growth-Focused DIY Hair Masks
Banana Preparation:
- Use fully ripe banana for maximum nutrient content
- Mash until absolutely no lumps remain (lumps are difficult to remove)
- Strain through fine mesh if necessary to achieve smooth consistency
Cinnamon Integration:
- Use Ceylon cinnamon rather than cassia for gentler effect
- Mix with small amount of honey first to prevent clumping
- Patch test cinnamon mixture on inner arm before full application
Scalp-Focused Application Technique
Pre-Application Scalp Massage:
- Perform 5-minute scalp massage before applying mask
- Use fingertips in circular motions to increase circulation
- Focus on areas where hair growth is desired
Strategic Application Method:
- Part hair into 1-inch sections for thorough scalp access
- Apply mixture directly to scalp using fingers or applicator brush
- Massage gently while applying to enhance absorption
- Work remaining product through hair lengths
- Cover with plastic cap to maintain warmth and enhance circulation
Enhanced Processing Protocol
Duration: 25-30 minutes for optimal circulation benefits Temperature Management: Room temperature maintains cinnamon’s stimulating properties Monitoring: Mild tingling is normal; remove if burning occurs
Gentle Removal for Sensitive Scalps
Removal Sequence:
- Rinse with cool water to soothe any cinnamon sensitivity
- Use wide-tooth comb to gently work out any banana particles
- Shampoo with gentle, sulfate-free cleanser
- Rinse thoroughly to remove all residue
Growth-Supporting Aftercare
Post-Treatment Scalp Care:
- Apply light scalp massage with fingertips
- Avoid heat styling for 24 hours after treatment
- Sleep on silk pillowcase to reduce friction
Frequency for Growth Goals:
- Use twice weekly for first month
- Reduce to weekly maintenance after initial period
- Track progress with photos and measurements
Expected Timeline for Growth-Stimulating DIY Hair Masks
Week 1-2: Improved scalp health and reduced inflammation Week 3-4: Enhanced hair strength and reduced breakage Month 2-3: Possible increased hair growth rate and improved hair quality Month 3+: Visible improvements in hair thickness and overall health
Important Notes:
- Hair growth occurs slowly; patience is essential
- This DIY hair mask supports optimal conditions but cannot override genetic factors
- Combine with healthy diet and lifestyle for maximum benefits
Recipe 5: Anti-Frizz Smoothing DIY Hair Mask for Curly and Unmanageable Hair
This smoothing DIY hair mask tames frizz, defines curls, and creates manageable hair using simple kitchen ingredients.
Frizz-Fighting Ingredients That Smooth and Define
1/2 cup coconut milk (full-fat): Provides rich conditioning and natural curl definition 2 tablespoons raw honey: Acts as humectant to maintain moisture balance 1 tablespoon apple cider vinegar: Smooths cuticles and eliminates frizz-causing buildup
Understanding Frizz Formation and Control in DIY Hair Masks
Frizz occurs when hair cuticles lift due to moisture imbalance, damage, or environmental factors. This DIY hair mask combats frizz through:
Cuticle Sealing: Apple cider vinegar’s acidity naturally smooths and seals hair cuticles Moisture Balancing: Coconut milk provides deep hydration without weighing hair down Humidity Protection: Honey creates a protective barrier that prevents moisture absorption from humid air
Specialized Mixing for Curl-Friendly DIY Hair Masks
Coconut Milk Preparation:
- Use full-fat coconut milk for maximum conditioning benefits
- Shake can thoroughly before opening to mix separated fats
- Allow to reach room temperature for easier mixing
Emulsification Technique:
- Whisk honey with small amount of coconut milk until smooth
- Gradually add remaining coconut milk while whisking
- Add apple cider vinegar slowly while mixing to prevent separation
- Achieve smooth, cream-like consistency
Curl-Preserving Application Method
Pre-Application: Work with damp hair to enhance curl formation and product distribution
Section-by-Section Technique:
- Divide hair into 6-8 sections based on curl pattern
- Apply mixture using “praying hands” method to maintain curl clumps
- Scrunch gently upward to encourage curl formation
- Avoid disturbing natural curl pattern during application
Processing for Maximum Frizz Control
Duration: 20-30 minutes with plastic cap for enhanced penetration Environment: Humid bathroom environment can actually benefit curl formation Positioning: Keep head upright to maintain curl shape during processing
Curl-Friendly Removal Technique
Gentle Removal Process:
- Rinse with cool water while scrunching to maintain curls
- Use minimal shampooing to preserve natural oils
- Apply conditioner only if hair feels stripped
- Squeeze excess water with microfiber towel (never rub)
Styling After DIY Hair Masks for Curls
Post-Mask Curl Enhancement:
- Apply light leave-in conditioner while hair is still damp
- Use curl cream or gel if additional hold is needed
- Air dry or use diffuser on low heat and speed
- Avoid touching hair until completely dry
Long-Term Frizz Management Strategy
Weekly Routine Integration:
- Use this DIY hair mask weekly during humid seasons
- Reduce frequency in dry weather when frizz is less problematic
- Combine with proper curl care techniques for maximum benefits
Progressive Results:
- Immediate: Reduced frizz and enhanced curl definition
- Weekly use: Improved hair manageability and styling ease
- Monthly benefits: Stronger, healthier curls with lasting frizz control
This anti-frizz DIY hair mask is particularly effective for:
- Naturally curly or wavy hair prone to frizz
- Hair damaged by heat styling or chemical treatments
- Hair affected by humid climate conditions
- Anyone seeking to enhance natural curl pattern
Customizing DIY Hair Masks for Different Hair Types
Understanding your specific hair type allows you to modify these DIY hair masks for optimal results and avoid potential issues.
Fine Hair Considerations for DIY Hair Masks
Modification Strategies:
- Reduce oil quantities by 50% to prevent weighing hair down
- Focus application on ends only, avoiding roots and scalp
- Decrease processing time to 15-20 minutes maximum
- Use lighter ingredients like aloe vera instead of heavy oils
Recommended Adjustments:
- Replace coconut oil with lighter jojoba or grapeseed oil
- Use egg whites only instead of whole eggs for protein treatments
- Dilute thick ingredients with water or aloe vera juice
Thick, Coarse Hair Adaptations
Enhancement Techniques:
- Double ingredient quantities for adequate coverage
- Increase processing time to 45-60 minutes for deeper penetration
- Add extra moisturizing ingredients like additional oils or butters
- Focus on intensive conditioning rather than protein treatments
Specific Modifications:
- Add 1 tablespoon of olive oil to any recipe for extra conditioning
- Include mashed avocado in protein treatments for additional nourishment
- Use warm (not hot) ingredients to enhance penetration
Color-Treated Hair Special Considerations
Protective Adaptations:
- Avoid clarifying ingredients like baking soda that may strip color
- Add UV protection through ingredients like coconut oil or shea butter
- Focus on moisturizing and protein-balancing treatments
- Test all DIY hair masks on hidden sections first
Color-Safe Modifications:
- Replace lemon juice with apple cider vinegar for gentler clarification
- Add honey to all treatments for its color-protecting antioxidants
- Use lukewarm water for mixing and rinsing to prevent color fading
Chemically Processed Hair Requirements
Damage-Focused Adjustments:
- Emphasize protein treatments to rebuild damaged hair structure
- Include anti-inflammatory ingredients like aloe vera or chamomile tea
- Avoid harsh cleansing agents that could cause further damage
- Increase frequency of moisturizing treatments
Healing-Oriented Modifications:
- Add 1 teaspoon of vitamin E oil to nourishing masks
- Include collagen-rich ingredients like gelatin in protein treatments
- Use cooler processing temperatures to prevent additional stress
Advanced Techniques for Maximizing DIY Hair Masks Effectiveness
Pre-Treatment Preparation Methods
Scalp Stimulation: Perform 5-10 minutes of scalp massage before applying DIY hair masks to increase circulation and enhance absorption.
Heat Enhancement: Gently warm ingredients (not hot) to improve penetration and effectiveness of DIY hair masks.
pH Optimization: Test and adjust the pH of your DIY hair masks to match hair’s optimal range of 4.5-5.5 for maximum benefits.
Application Enhancement Techniques
Sectioning Strategy: Divide hair into 8-12 sections for thorough, even application of DIY hair masks.
Layering Method: Apply DIY hair masks in thin layers, allowing each to partially absorb before adding more product.
Massage Integration: Gently massage scalp during application to boost circulation and ingredient absorption.
Processing Optimization
Temperature Control: Use shower caps and warm towels to create optimal processing environment for DIY hair masks.
Humidity Management: Process DIY hair masks in humid bathroom environment to prevent drying and enhance penetration.
Time Monitoring: Set timers to ensure precise processing times and prevent over-treatment.
Professional Removal Techniques
Gradual Dilution: Add small amounts of water while massaging to gradually dilute DIY hair masks before full removal.
Temperature Progression: Start removal with cool water, gradually increasing temperature if needed.
Complete Cleansing: Ensure all residue is removed to prevent buildup and maintain hair health.
Safety Guidelines and Precautions for DIY Hair Masks
Allergy Testing and Sensitivity Prevention
Patch Testing Protocol:
- Apply small amount of DIY hair mask mixture to inner forearm
- Wait 24-48 hours for any reaction to appear
- Test each new ingredient individually if sensitivities are suspected
- Document reactions for future reference
Common Allergens in Kitchen Ingredients:
- Eggs (protein allergies)
- Dairy products (lactose intolerance or milk protein allergies)
- Nuts (tree nut allergies if using nut oils)
- Citrus (can cause photosensitivity)
Safe Ingredient Handling
Temperature Safety:
- Never use hot ingredients that could burn scalp
- Test temperature with wrist before applying to hair
- Allow heated ingredients to cool to lukewarm before use
Hygiene Practices:
- Use clean utensils and bowls for mixing DIY hair masks
- Wash hands thoroughly before preparation and application
- Use fresh ingredients and discard leftover mixtures immediately
Signs to Discontinue Use
Immediate Stop Indicators:
- Burning, stinging, or severe itching during application
- Rash, swelling, or hives on scalp or face
- Difficulty breathing or other systemic allergic reactions
- Severe hair tangling or matting that doesn’t resolve with gentle detangling
Gradual Concerns:
- Increased hair breakage or shedding
- Persistent scalp irritation after multiple uses
- Hair becoming increasingly dry or brittle
- Changes in hair texture that don’t improve over time
Emergency Procedures
Immediate Reactions:
- Remove DIY hair mask immediately with cool water
- Apply cool compress to affected areas
- Take antihistamine if allergic reaction is suspected
- Seek medical attention for severe reactions
Hair Damage Control:
- Use deep conditioning treatments if hair becomes over-processed
- Consult professional stylist for severe tangling or damage
- Consider protein treatments if hair becomes mushy from over-moisturizing
Storage, Preparation, and Batch-Making for DIY Hair Masks
Proper Storage Techniques
Fresh Ingredient Management:
- Purchase ingredients in small quantities to ensure freshness
- Store oils in cool, dark places to prevent rancidity
- Keep dairy products properly refrigerated until use
- Use honey and other stable ingredients within reasonable timeframes
Made-Ahead Options: While DIY hair masks are best used fresh, some components can be prepared in advance:
- Oil blends can be mixed and stored for up to 1 month
- Dry ingredient mixtures (like oatmeal and cinnamon) can be pre-combined
- Frozen ingredients like banana can be prepared and portioned
Efficient Preparation Methods
Batch Ingredient Prep:
- Measure out portions for multiple DIY hair masks at once
- Pre-mix dry ingredients in labeled containers
- Prepare base mixtures that can be customized for different needs
Time-Saving Techniques:
- Use immersion blender for smooth, quick mixing
- Prepare ingredients while conditioning hair during regular wash routine
- Set up dedicated DIY hair mask station with all necessary tools
Quality Control and Consistency
Measurement Accuracy:
- Use standard measuring spoons and cups for consistent results
- Weight measurements provide more accuracy than volume for some ingredients
- Document successful ratios for future replication
Texture Assessment:
- Aim for smooth, spreadable consistency without lumps
- Adjust thickness with water or additional oils as needed
- Strain mixtures if lumps cannot be eliminated through mixing
Cost Analysis: DIY Hair Masks vs. Commercial Treatments
Economic Benefits of Homemade Hair Care
Ingredient Cost Breakdown:
- Average cost per DIY hair mask: $2-5 depending on ingredients
- Equivalent commercial mask: $15-50 per treatment
- Annual savings using DIY hair masks: $200-800 for weekly treatments
Bulk Purchasing Advantages:
- Kitchen staples like honey and oils serve multiple purposes
- Buying in bulk reduces per-treatment costs significantly
- Many ingredients last months when properly stored
Value Beyond Cost Savings
Quality Advantages:
- Fresh ingredients provide maximum potency
- No preservatives or synthetic additives
- Customizable formulations for specific needs
- Complete control over ingredient quality and sourcing
Convenience Factors:
- No need to schedule salon appointments
- Available anytime with common kitchen ingredients
- No travel time or waiting for appointments
- Can be done while multitasking at home
Long-Term Financial Impact
Reduced Professional Treatment Needs:
- Regular use of DIY hair masks may reduce need for salon treatments
- Improved hair health decreases damage requiring professional repair
- Prevention focus saves money compared to damage correction
Multi-Purpose Ingredient Benefits:
- Kitchen ingredients serve culinary and beauty purposes
- Reduces need for multiple specialized products
- Simplifies shopping and storage requirements
Professional Tips for Salon-Quality Results with DIY Hair Masks
Stylist-Approved Techniques
Application Precision: Professional stylists recommend applying DIY hair masks in 1/4-inch sections for thorough coverage and optimal results.
Processing Enhancement: Use professional techniques like steam treatments (standing in humid bathroom) to enhance DIY hair masks penetration.
Timing Optimization: Follow professional timing guidelines: 15-20 minutes for fine hair, 30-45 minutes for thick or damaged hair.
Professional Assessment Methods
Hair Analysis Before Treatment:
- Examine hair porosity by observing how quickly water is absorbed
- Assess damage level by gently stretching wet hair
- Evaluate scalp condition for any irritation or sensitivity
Progress Monitoring:
- Take photos in consistent lighting to track improvements
- Keep treatment log noting which DIY hair masks work best
- Measure hair length monthly to assess growth benefits
Advanced Professional Techniques
Steam Treatment Integration: Professionals often use steam to enhance treatment penetration. Replicate this by:
- Processing DIY hair masks in steamy bathroom
- Using warm towel wraps during processing
- Creating humid environment for enhanced absorption
Scalp Massage Integration: Incorporate professional massage techniques:
- Use fingertips in circular motions
- Apply gentle pressure to stimulate circulation
- Focus on tension areas like temples and crown
Seasonal Adaptations for DIY Hair Masks
Winter Hair Care with DIY Hair Masks
Cold Weather Challenges:
- Dry indoor air reduces hair moisture
- Static electricity from heating systems
- Temperature extremes cause hair brittleness
Winter-Specific DIY Hair Mask Modifications:
- Increase oil content by 25% for extra moisture protection
- Add humectant ingredients like glycerin (small amounts)
- Focus on deep conditioning treatments twice weekly
Recommended Winter Ingredients:
- Rich oils like avocado or coconut for intense moisture
- Honey for humidity retention in dry environments
- Proteins to strengthen hair against winter damage
Summer Adaptations for DIY Hair Masks
Hot Weather Considerations:
- Increased oil production from heat and humidity
- UV damage from extended sun exposure
- Chlorine and salt water exposure
Summer DIY Hair Mask Adjustments:
- Reduce oil quantities and focus on lighter moisturizers
- Include UV-protecting ingredients like coconut oil
- Add clarifying components to remove chlorine and product buildup
Heat-Weather Ingredient Swaps:
- Replace heavy oils with aloe vera gel
- Use cooling ingredients like cucumber or green tea
- Include antioxidants like vitamin E to combat sun damage
Spring and Fall Transition Strategies
Seasonal Change Adaptations:
- Gradually adjust DIY hair masks formulations as weather changes
- Address seasonal shedding with growth-supporting treatments
- Prepare hair for upcoming weather challenges
Transition-Friendly Ingredients:
- Apple cider vinegar for pH balancing during seasonal changes
- Light oils that work in various humidity levels
- Protein treatments to strengthen hair for seasonal transitions
Troubleshooting Common DIY Hair Masks Issues
Texture and Mixing Problems
Lumpy or Grainy Textures:
- Solution: Use immersion blender or food processor for smooth consistency
- Prevention: Allow ingredients to reach room temperature before mixing
- Alternative: Strain mixture through fine mesh to remove lumps
Separation Issues:
- Cause: Oil and water-based ingredients naturally separate
- Solution: Add emulsifying agent like egg yolk or lecithin
- Quick Fix: Remix immediately before application
Application Difficulties
Product Won’t Spread Evenly:
- Hair Too Dry: Lightly mist hair with water before application
- Product Too Thick: Thin with small amounts of water or aloe vera juice
- Technique Issue: Apply to smaller sections for better control
Difficult Removal:
- Protein Masks: Use cool water only to prevent protein from setting
- Oil-Heavy Masks: Apply small amount of shampoo to dry hair first, then add water
- Sticky Ingredients: Use clarifying shampoo if regular removal methods fail
Unexpected Results
Hair Feels Dry After Moisturizing Mask:
- Cause: Protein overload or ingredient intolerance
- Solution: Follow with deep conditioning treatment
- Prevention: Reduce protein content or frequency of protein-rich DIY hair masks
Increased Tangling:
- Cause: Protein buildup or inadequate removal
- Solution: Use clarifying treatment followed by intensive conditioning
- Prevention: Ensure complete removal and alternate mask types
Scalp Irritation:
- Immediate Action: Remove mask immediately and rinse thoroughly
- Soothing Treatment: Apply cool aloe vera gel to affected areas
- Future Prevention: Patch test all ingredients and reduce active ingredient concentrations
Performance Optimization
Masks Not Providing Expected Results:
- Assessment: Evaluate hair needs and match appropriate mask type
- Adjustment: Modify ingredient ratios or processing time
- Frequency: Increase or decrease usage frequency based on hair response
Results Plateau:
- Cause: Hair adaptation to specific ingredients
- Solution: Rotate between different DIY hair masks recipes
- Enhancement: Combine with complementary treatments like scalp massage
Long-Term Hair Health Strategy Using DIY Hair Masks
Creating a Sustainable Hair Care Routine
Weekly Planning:
- Monday: Clarifying DIY hair mask for buildup removal
- Wednesday: Protein treatment for strength
- Saturday: Deep moisturizing mask for nourishment
Monthly Assessments:
- Evaluate hair condition and adjust mask selection
- Modify recipes based on seasonal needs
- Document progress and successful combinations
Quarterly Deep Treatments:
- Intensive repair masks for cumulative damage
- Professional consultation if needed
- Ingredient inventory and freshness check
Progressive Goal Setting
Short-Term Goals (1-3 months):
- Establish consistent DIY hair masks routine
- Identify most effective recipes for your hair type
- Achieve basic improvements in manageability and appearance
Medium-Term Goals (3-6 months):
- Significant improvement in hair health metrics
- Reduced dependency on commercial products
- Optimized routine requiring minimal time investment
Long-Term Goals (6+ months):
- Maintained hair health with minimal intervention
- Advanced technique mastery for varying needs
- Possible mentoring others in effective DIY hair masks
Integration with Overall Hair Health
Lifestyle Factors:
- Nutrition supporting hair health from within
- Stress management for optimal hair growth
- Sleep quality affecting hair regeneration
Complementary Practices:
- Regular scalp massage independent of DIY hair masks
- Protective styling to minimize damage
- Heat styling reduction and proper protection when necessary
Environmental Protection:
- UV protection during extended sun exposure
- Chlorine protection for swimmers
- Hard water filtration if mineral buildup is problematic
Conclusion: Transforming Your Hair with DIY Hair Masks
The journey to healthier, more beautiful hair doesn’t require expensive salon treatments or complicated commercial products. Through the strategic use of DIY hair masks made from simple kitchen ingredients, you can achieve professional-quality results while maintaining complete control over what you put on your hair.
These five transformative DIY hair masks represent more than just cost-effective alternatives to commercial treatments – they offer a return to natural, gentle hair care that works in harmony with your hair’s biological processes. From the deeply moisturizing avocado and honey combination to the growth-stimulating banana and cinnamon treatment, each recipe addresses specific hair concerns using scientifically-backed ingredients that deliver real results.
The effectiveness of DIY hair masks lies not only in their natural ingredients but also in their freshness, customizability, and the care you put into creating them. Unlike mass-produced products that must maintain shelf stability and appeal to broad markets, your homemade treatments can be tailored precisely to your hair’s unique needs and adjusted based on seasonal changes, hair condition, and personal preferences.
Success with DIY hair masks requires patience, consistency, and willingness to experiment with different combinations and techniques. The recipes provided serve as proven starting points, but your journey with DIY hair masks will evolve as you discover what works best for your individual hair type and lifestyle.
Remember that hair transformation is a gradual process. While you may notice immediate improvements in manageability and appearance, the most significant benefits of regular DIY hair masks use develop over months of consistent application. Document your progress, celebrate small improvements, and maintain realistic expectations about timeline and results.
The economic benefits of DIY hair masks extend beyond simple cost savings. By reducing dependence on commercial products and potentially decreasing the need for professional treatments, you’re investing in long-term hair health while developing valuable self-care skills that will serve you throughout your life.
As you embark on your DIY hair masks journey, embrace the experimental nature of natural hair care. Each treatment is an opportunity to learn more about your hair’s needs and responses. Keep detailed notes about what works, what doesn’t, and how different factors like weather, stress, and health affect your results.
The five DIY hair masks presented here offer solutions for the most common hair concerns, but don’t limit yourself to these recipes alone. Use them as foundations for further experimentation, adding new ingredients and modifications as you become more comfortable with natural hair care techniques.
Your kitchen contains a treasure trove of hair-transforming ingredients waiting to be discovered. With the knowledge and techniques provided in this guide, you’re equipped to create effective, personalized DIY hair masks that rival any commercial treatment in both results and satisfaction.
Start your DIY hair masks journey today with the recipe that best addresses your primary hair concern. Commit to consistent use for at least one month, document your progress, and prepare to be amazed by what simple kitchen ingredients can accomplish for your hair health and beauty.
The path to naturally beautiful hair begins with a single DIY hair mask treatment. Take that first step today, and discover the transformative power of ingredients you already have at home.
Internal Links: